 |
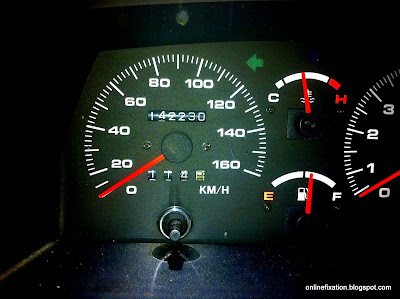
| Suzuki Vitara Instrument Panel |
Thus, I decided to have this fixed. I simply had enough. I want my peaceful nighttime driving back.
Upon googling, I haven't seen a straight walkthrough on DIY replacement of speedometer cable for the Vitara. This is gonna be harder than I thought, so I'm writing this as a guide for those who need to repair their noisy speedometer by changing the speedo cable.
Materials List
- Speedometer Cable
- WD-40 (or any other penetrating lubricant)
- Screwdrivers (both flat and philips head)
- Flashlight (I recommend high intensity LED flashlights)
- Matting (you'll need this when you go under the vehicle)
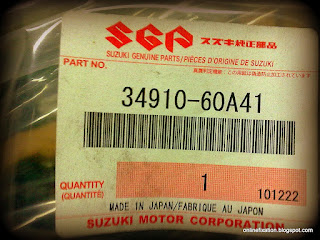
I ordered the original speedometer cable (SGP Part Number 34910-60A41) from my trusty Suzuki parts dealer. I could have opted for the cheaper version but the price difference is negligible. The speedometer cable is pre-lubricated and had a rubber grommet (for mounting on the firewall).
 |
| Original Speedometer Cable for Suzuki Vitara JLX |
Procedure
1. Remove the Steering Wheel
The steering wheel must be removed so that you'll have enough room to remove the instrument panel later.
2. Remove the Instrument Panel
The instrument panel is sandwiched between two plastic panels, held in place by screws. Remove the outer cover panel first, then remove the instrument panel. Be extremely careful when handling the instrument panel since the whole back of it is covered with circuitry printed on green plastic. One wrong move and this might get torn, costing you lots more.
Behind the instrument panel are two wiring connectors and the speedometer cable. To remove the wiring connectors, you just need to pinch the clip and pull slowly. To remove the speedometer cable, gently pry the metal clips holding the cable in place. There are three metal clips, but you may just need to pry one or two. When the cable is loose, gently slide it outwards.
3. Remove the Cable
Here comes the tricky part: removing the cable.
I tried Googling for the actual location and mounting points of the speedometer cable, but was unsuccessful. So what I did is trace it by myself using a flashlight and a fair amount of tugging. At a glance, the speedometer cable goes from instrument panel, making a slight downward turn, snaking across the metal steering column (mine was actually held in this part by a black plastic clip) straight towards the center console (where it is tucked on some white plastic housing that is probably part of air-conditioning system), then making a 90 degree turn towards the firewall (passenger side) where it is held by a rubber grommet, then on the engine bay, the cable makes a U-turn towards the transmission, snaking along the chassis and held in place by a plastic clip. Then the speedometer will come across a metal clip, sort of a bent wire, before doing another 90 degree turn towards the transmission. The speedometer cable end is secured in place with a metal knob, similar to plastic bottle cap.
 |
| This is the part that is attached to the transmission, with the rubber gasket, metal knob, and shaft |
I strongly suggest to first trace the line after removing the instrument panel, before you actually remove the speedometer cable. This way, you won't have to guess. As an added security, this is the best time to take pictures if you have a camera because your hands are not yet dirty or greasy.
The hole in the firewall is almost the same size as the instrument panel end of the speedometer cable, so you must push back in place the three metal clips to make it pass through the firewall.
To remove the speedometer cable, remove it from the clips that are securing it, starting from the black plastic near the steering wheel, the white one from the center aircon housing, the rubber grommet in the firewall, and the black clip on the chassis. Unscrew the metal knob on the transmission end of the cable. If it is stuck, spray around the area with WD-40 (or any penetrating lubricant). Let it seep for a while before trying to remove again. Use rags to turn it by hand. One technique to remove it without using a tool is to wrap the metal knob with rubber, then turn it by hand. The rubber will allow you turn it with ease, and will spare your skin from unnecessary cuts.
From the driver side, slide the speedometer cable towards the hole in the firewall. Exercise extreme caution since the cable will be moving across some wires and sensitive connectors. When the cable is outside, pull the cable from the engine bay.
4. Install the Cable Starting From Engine Bay
Now, you can install the new speedometer cable. Start from the engine bay side of the firewall. Slide the end of the cable (only one end will fit that hole) about one third of the length (up to the rubber grommet). Then bend the cable slightly to make a downward U-turn towards the transmission.
5. Attach the Cable (Transmission side)
Connect the speedometer cable to the transmission. The shaft of the cable is notched which should be seated firmly into the hole in the transmission. If the shaft is short, just push the other side of the cable. Secure the cable by screwing the metal knob.
6. Connecting to Instrument Panel
On the other side of the firewall, slowly slide the cable towards the instrument panel, following the path of the old one.
Connect the speedometer cable to the instrument panel. Just snap it in place and the three metal clips will secure it.
Connect the two electronics connector. Then install the instrument panel back to the dashboard. You may need to check the slack of the speedometer cable since it must not be bent at an angle or the inside part of the cable won't turn!
Double check everything before installing the instrument panel back to the dashboard. Check the plastic clips, rubber grommet, and the metal clips.
7. Install Steering Wheel
Lastly, install the steering wheel. You have just finished replacing the speedometer cable yourself. Congratulations!
8. Testing the Speedometer
To test the newly installed speedometer cable, drive the vehicle with the windows up and the aircon off. The instrument panel should be quiet now.
If the instrument panel is quiet because the needle is not moving (and your vehicle is in motion), either you have a faulty cable or you installed it improperly. Better check if the cable is securely attached to both instrument panel and transmission.
If you have a GPS, you may have somebody assist you in checking the accuracy of the speedometer. Drive at a constant speed in a safe street with no traffic and compare the speedometer reading to the GPS. If you are off by 5% or more (and your tire size is still stock), you might have a faulty instrument panel.
4 comments:
Your article is very helpful. All the steps in one location. I dont have to google by parts. Thanks!
Thanks for making this article. I hope you right more instructionals about your Vitara as I just bought a JLX and would find your knowledge very very helpful.
Cheers!
Thanks for this article. I hope you write more Vitara guides since I just bought a JLX and your knowledge is very very helpful. Thanks again.
Cheers!
Hi, I have a 97 vitara which I bought this May and have done a lot to improve its performance. I had the engine overhauled and now everything is Ok except for the aircon which I have experience when it is operating. The rpm drops when the aircon is on and sometimes the engine dies while it is cooling and even the acceleration gets affected. Should there be anything that should be done to the engine or the servo in order to put back the normal operation of the aircon. Any advise is appreciated. Thanks. Chiqui
You can email me at: chiquitingarriola@yahoo.com
Post a Comment